Friday, December 23, 2011

Breaking Dawn Part 1


I'm definitely not a movie critic so I won't give you my full review of the first Breaking Dawn, but I will say that really enjoyed this movie (and even more the 2nd time).  I wouldn't say it was my favorite but the series has definitely come a long way since the first Twilight which was just an embarrassment to great book. Instead of reviewing the movie I wanted to share all the awesome cupcakes and prizes my friend and I made for the midnight showing party she holds each year.  This was the third year in a row my friend has rented out a movie theater so that 120 of her closest friends can see and enjoy (or hate on) the Twilight Saga movies together.  She also makes sure there are plenty of cupcakes for everyone to enjoy before the movie and creates her very own trivia game. This year I was able to help make the cupcakes and a lot of the prizes for the trivia game; so for a good week before we scrambled to make prizes and eight dozen Breaking Dawn themed cupcakes.  It's going to be hard top everything we did this year for Part 2 next year.
Here are just a few pictures of everything we made.

The Cupcakes:

We know it's wrong but a half vampire baby being born cupcake was needed


"Why am I covered in feathers"
Werewolf cupcakes are a must!
Isle Esme


The Prizes (all made with vinyl and my Silhouette of course!):
Ornaments purchased from Michaels and wine glasses purchased from Cost Plus


Saturday, October 22, 2011

Happy Halloween


I can't believe this year has gone by so fast and that Halloween is right around the corner! I'm still trying to figure out my costume, probably a Pam Am stewardess if I can find the right skirt and bag, I'm thinking I can make the hat, and buy the gloves and shoes.

What I am excited about is that I got all the decorations I wanted to create for this year done.  I had been dying to make a Halloween wreath so I made sure I went to Michael's early this year to get everything I needed since they always seem to be two holidays ahead then the one actually coming up.  I wanted a goth inspired wreath, I found all these great black and sparkly neon spiders and butterfly's that I mixed into black glittery flowers. 


The rest of my decorations were made with my Silhouette, which I'm finding more and more uses for and I'm loving it! It makes everything so easy.


My thought was to do Halloween/Fall inspired lanterns that I could use through Thanksgiving, but the more I thought about I couldn't find designs that fit both holidays, plus I really wanted to use the neon green and purple vinyl that didn't really scream Fall. So instead I went back to Ikea and bought two more lanterns that will be Fall only and I could dedicate these to just Halloween. My first lantern was inspired by my love of Pumpkin Patches, with a Jack-O-Lantern face and "Pumpkin Patch" and "Spooky" on either side. My second was supposed to be a bit more "scary" with "Happy Haunting" on the front and covered in spider webs and hanging bats.  I'm very happy with the way these turned and can't wait to make my fall ones!

Next I decorated some fake pumpkins from Michael's to say "Trick-or-Treat", I loved the way these turned out and they make the front entry look more inviting to Trick-or-Treater's.
Now all my entry way is missing is some real pumpkins...that will be a goal for this weekend.


Happy Halloween Everyone!!!!

Friday, September 2, 2011

My First Quilt

I have finally made a quilt, it's always been on my list but I thought making one would be too difficult.  When I think of quilts I think of all those intricate designs and small pieces you have to sew together.  It just seemed too big a task for me to take on, but then a friend of mine was showing me some quilts she made, they were the cutest baby rag quilts.  I had never heard of a rag quilt and immediately wanted to try to make one, I just needed an excuse.  As luck would have it my mom had an up coming  baby shower for her friend's daughter, so I told my mom I would make her one to give as a gift.

I now think the hardest part of making a quilt is finding five to six coordinating fabrics that you want to put together to make your quilt.  I probably spent a good two hours at the fabric store trying to find the right fabrics. In the end I did, I went with a Brown/Pink theme (since she's having a girl), I found the cutest pig and baby girl word fabric that I paired with some polka dots and stripes. I also bought a rotary cutter and micro-tip easy action scissors, these are essential for making a rag quilt.

Once I had my fabric and tools I went on YouTube and found the greatest video that explains step by step how to make a rag quilt, I understood the basics from what my friend told me but wanted something to refer back to as I was sewing.  You can find the video here: Beverly's How-To.

And here is my finished product:
Back - Minky & Flannel patches
Front View
Close Up of Front

 I also made a matching "Taggie", post coming soon.

If you love these Rag Quilts as much as I do my friend sells hers on Etsy, they are super cute!!!  Check out her shop here: Little Shop Of Moxi


Monday, July 18, 2011

It's a Bitter Sweet Ending


For those that don't know, which I'm sure there are few, the last installment of the Harry Potter movie series came out this past Friday.  Although the movie was great I'm slightly depressed now that it's really over.

Radish Earrings


Since this was the last movie we of course had to go to the midnight showing, we of course had to make shirts, and we OF COURSE had to have Butterbeer Cupcakes!!! Oh and you can't forget the Radish and Snitch earrings!

I hope everyone that saw the movie enjoyed it as much as we did!!!

Butterbeer Cupcake recipe courtesy of Confessions of a Cookbook Queen.  These cupcakes were delicious, you could really taste the cream soda and the butterscotch in the frosting was amazing!

Thursday, July 7, 2011

Happy 4th of July

I'm just a tad bit late getting these up but I wanted to share some 4th of July crafts that I did this year.

The first are these super cute metal stars I found on Pick Your Plum, this amazing craft site.  I started by painting blocks of wood red, white and blue (of course) and then nailed the stars to the wood, super easy! I would have preferred the wood border around the stars so I might remove the nails next year and try something new, I could redo these decorations every year if I want to.


My next project is probably one of my favorites! I am obsessed with decorating everything with vinyl (more to come on that), ever since I've gotten my Silhouette the possibilities on what I can make have become endless. I think I might have to make one of these for every holiday, they look great in my front entry way.

Thursday, May 12, 2011

Chicks & Bunnies

This post is very late but....Happy Belated Easter!!

For Easter this year I had my heart set on making Chick and Bunny cake pops that I had seen on Bakerella a year or so ago.  I decided I would do lemon cake for the Chicks and strawberry cake for the Bunnies...although the strawberry was good now that I think about it carrot cake would have been a good idea too for the Bunnies.

I was excited for how the Chicks turned out, they were a lot easier than the Bunnies, which turned out looking like scary aliens.  I wasn't able to find the pastel confetti sprinkles I needed for the eyes so I used rainbow candy coated sprinkles instead and they might have been too big and beady for eyes.  Another problem I had was with my edible pens, I have not been able to find pens that actually write on candy coating.  Does anyone have any suggestions on edible pens that actually work?

Cake Pop version of a Peep


 Next year I'll try making Peep Sushi that a friend of mine pointed out.

Sunday, April 10, 2011

Macarons

For probably close to a year now I've  been wanting to make Macarons, not the coconut ones, but the delicate and pretty sandwich ones. It's taken me this long to give them a try because every blog I've read (and I've read a lot) focus on how difficult they are to make, that almost everything that can go wrong will, and you have to leave your egg whites sitting out to age for a couple of days (that seemed sketchy to me).  Anyway, my friend Melissa recently made some and had success, this gave me the courage to give them a try; I now had someone I could talk to about the techniques she tried and what worked for her, we actually chatted via Gmail the entire time I was making my cookies.

So it went like this:
- I cracked and separated my eggs on Tuesday night and let them sit all day Wednesday and Thursday
- Thursday I got organized; I pre-weighed all my ingredients (every Macaron recipe I've found is in grams so good thing I have a scale), got my mixer fitted with the whisk, and I lined my baking sheets with parchment paper that I'd drawn 1.5 inch circles on so I made the same size cookies
- Now it was down to actually making the cookies, I followed a recipe and instructions from Brave Tart
  1. I mixed my egg whites with the sugar and salt - mixed for a total of 9 minutes
  2. Sifted the almond flour with the powdered sugar
  3. Added the vanilla and coloring to the egg/sugar/salt mixture (meringue) - mixed for one more minute
  4. Added the almond/sugar to the meringue and started to hand mix (fold and press) with a rubber spatula, once I thought the consistency was right I spooned the batter into a piping bag fitted with a regular round tip
  5. Piped the cookies onto the prepared baking sheets and let sit for 15-18 minutes so they could firm up
  6. Then popped them into the oven to bake and crossed my fingers
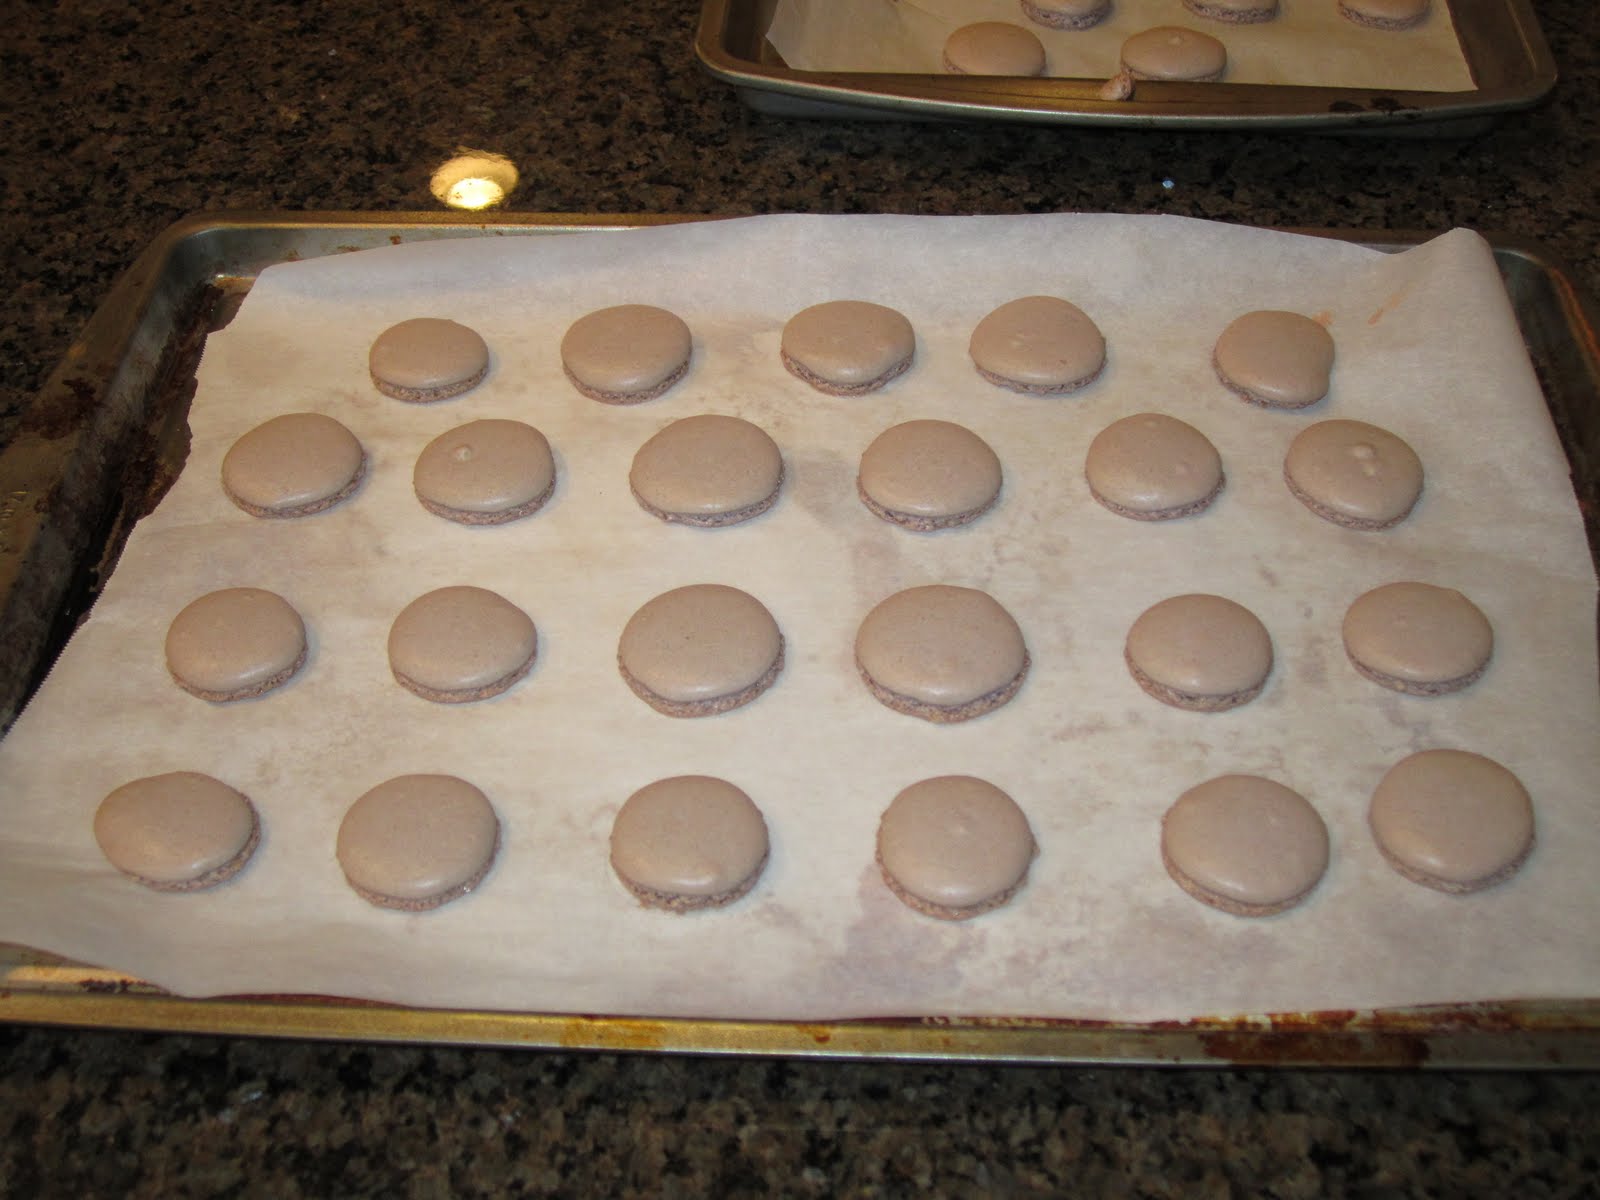
The results were mildly successful and most importantly they were edible, but here is what I think I did wrong:
  1. I didn't sift the almond flour and powdered sugar enough
  2. I didn't mix the meringue, almond flour, and powered sugar into the right consistency; my batter was still kind of lumpy and didn't spread like I thought it should
  3. I cooked two tray at once (one on top and one on bottom) and I over cooked them...my first batch produced hollow cookies, which I don't think is right
  4. My second batch was just one tray and I cooked them for a less time, 15 rather than 18 minutes, they were better but I still think they need to be cooked for less time
All in all, I was very happy with my first attempt.  Having Melissa there to talk to helped a ton and Brave Tart made the whole process seem less scary.  I will definitely be trying these again.

Oh and I used the Bailey's Ganache recipe from my St. Patty's Day Guinness Cupcakes...delicious!!!

ingredients ready to go


ready to go into the oven

they were supposed to be purple

Success (sort of)